LocalNode
How it worksDemoAppsPricingFAQShop now
← All guides
Home/Community/Connecting Nextcloud to External Storage

Connecting Nextcloud to External Storage

Files
Beginner
5 min read
Published: May 7, 2026

Was this helpful?

Help us improve our community guides.

In this guide

  • Overview
  • Step 1: Enabling the External Storage app
  • Step 2: Configuring the mount point
  • Step 3: Setting user permissions
  • Next Steps

Need direct help?

LocalNode Care Plan members get priority remote support.

Email Support →

More in Files

Collaborating on Documents in Nextcloud

Collaborating on Documents in Nextcloud — Step-by-step guide for your LocalNode.

5 min read

Setting Up Nextcloud for the First Time

Setting Up Nextcloud for the First Time — Step-by-step guide for your LocalNode.

5 min read

Setting Up Nextcloud Talk for Private Family Chat

Setting Up Nextcloud Talk for Private Family Chat — Step-by-step guide for your LocalNode.

5 min read
LocalNode

Plug-and-play home server. Your data, your hardware, your rules.

Product

How it worksDemoAppsCommunityPricingFAQ

Support

ContactShipping & ReturnsTrack Order

Legal

Privacy PolicyTerms of ServiceShipping Policy
© 2026 LocalNode. Built for people who value their privacy.Denton, TX · hello@localnode.tech

⚠️ Advanced — requires correct file paths

By default, Nextcloud stores all its files inside a hidden database structure on your internal drive. If you want Nextcloud to read files from a USB drive or your Jellyfin media folder, you must use the External Storage plugin.

Overview

The External Storage plugin allows you to take any folder on the LocalNode (like /media/movies or an external drive mounted at /mnt/storage/BackupDrive) and mount it as a visible folder inside the Nextcloud web interface. This is how you allow Nextcloud to interact with files used by other apps.

Step 1: Enabling the External Storage app

  1. Log into Nextcloud with your Admin account.
  2. Click your profile picture in the top right and select Apps.
  3. In the left sidebar, click on "Disabled apps" or search for "External storage support".
  4. Find External storage support and click Enable.

Step 2: Configuring the mount point

Now we must tell Nextcloud exactly where the drive is located.

  1. Click your profile picture again and select Administration settings.
  2. In the left sidebar, scroll down to the Administration section and click External storages.
  3. In the "Folder name" box, type the name you want to appear in Nextcloud (e.g., "USB Drive").
  4. Under "External storage", select Local from the dropdown menu.
  5. Under "Authentication", select None.
  6. Under "Configuration", type the absolute path to the drive (e.g., /mnt/storage/MyUSB).
Nextcloud admin External storages panel showing how local or remote mounts are added.
Nextcloud documentation screenshot (nextcloud/documentation, AGPL / CC BY-SA depending on section).

Step 3: Setting user permissions

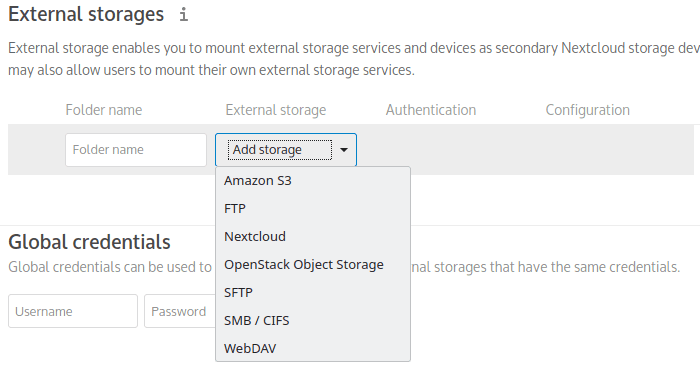
By default, when you mount a drive, only the Admin can see it.

  1. In the same row where you just configured the drive, look for the "Available for" box.
  2. Type the names of the family members who should have access to this drive, or leave it blank to give access to everyone.
  3. Click the checkmark on the far right to save the configuration.
  4. If the path is correct, a green circle will appear next to the folder name. If it turns red, the path is wrong or Nextcloud does not have permission to read that folder.

Now, if you return to the main Files app, you will see a folder named "USB Drive" with a small external link icon on it. You can interact with these files exactly as if they were natively inside Nextcloud.

💡 Tip: If you add files to the external drive via a different app (like dragging movies in via File Explorer), they might not immediately show up in Nextcloud. Nextcloud must scan external drives periodically to detect new files.

Next Steps

  • How to properly mount a USB drive to the LocalNode

Need help? Email hello@localnode.tech or visit localnode.tech/contact.